September 14, 2016 2 Comments
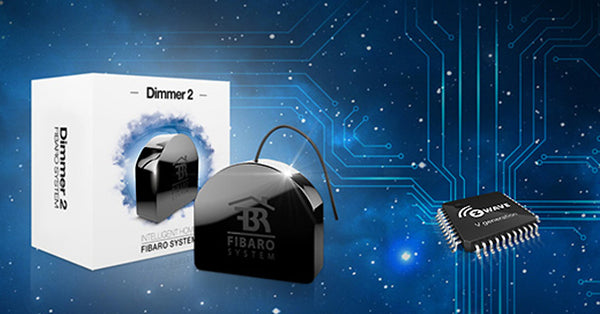
The Fibaro Dimmer 2 has been available in Europe for quite some time and listed on the Fibaro US website as “coming soon” for too many months to count. Fibaro has made several of their Z-Wave devices available in the states (RGBW controller, Motion sensor, Flood sensor, etc.) and all of them have generally been well received. The company really does set a high standard for quality home automation devices. So, with that being said, does the Dimmer 2 live up to the Fibaro name and was it worth the wait? Read on to find out if this device stands out in the crowded IoT market.
The size of the Dimmer 2 quite a bit smaller than the Aeon Labs Micro Dimmer (the competing US in wall dimmer). This will make it a little easier to fit into your switch box. One thing that sets this device apart is that it has two switch ports (labeled S1 & S2). There are a couple different uses for the second switch port, so it is a great addition to have. First, you can use it in 3-way switch configurations. This can be a great benefit, as it can be quite difficult sometimes to get an in-wall dimmer to work with multiple switches. This gives you one additional way to do that, and being able to simply connect two switches without resorting to an advanced 3 way circuit, could really benefit a lot of people.
The second use for the S2 port, is scene activation. S1 & S2 both send different scene ids when you single, double, and triple click the switch connected to them. Even when the switch is held vs. pressed a different scene id is sent. What this means to a user, is that (with a compatible gateway), you can assign different actions to be carried out when you do such things as double or triple click the switch. For example, you could have a triple click lock your front door, or a double click turn off all the lights in your house. This is a very handy feature that really has limitless possibilities.
Installation and configuration are straightforward and typical for this kind of device. Consult the documentation or a licensed electrician for wiring help, but after that, use is as expected.
Inclusion: While your controller is in pairing mode, quickly press (3 times) the B-button (or the switch attached to switch port 1 - S1). This should include the switch into your Z-Wave network. Removal is done in the exact same way, but when your controller is in exclusion mode.
Use: You can either connect a momentary or toggle type switch to it. It should automatically detect which one is connected, but you can manually specify with a configuration parameter. With a toggle switch, toggling either turns the switch on or off. The dimming functionality can be controlled by your gateway. You can also use the scene activation functionality (mentioned above) in this mode with not as many variations. With a momentary switch attached, you can also dim the lights by pressing and holding the button down. Hold it down to increase the brightness. Stop and do it again to decrease it. While the device works great in both configurations, having a momentary connected really lets you use the dimmer to its fullest.
Leave it up to Fibaro to include 50 configurable options on this dimmer. They all seem useful in their own regard, but here are just a few that really stand out:
Forced switch on brightness level: This allows for the light to be turned on at a certain level when it is controlled by the physical switch. If you have automations that change the dimming to various levels depending on an event or time of day, it is nice to know that when I turn it on via the switch, it comes on at a predefined level (instead of who knows what). Of course, it can then be dimmed up or down by pressing and holding the switch attached to it.
Scene activation functionality: As mentioned in the “size and build” section, the two switch ports on this dimmer can send scene activation reports allowing you to set up all kinds of nifty actions when the switches are double clicked, triple clicked, held, or pressed.
Configurable power and energy reports: It is completely customizable when the device sends energy and power reports. You can have a report sent on a percentage threshold or a time period.
If your Z-Wave gateway supports it, this dimmer has excellent energy reporting. This feature is a great feature to have as more and more people are trying to save energy.
Match state of physical switch: This is kind of a neat feature if you are using toggle switches and want the state of the physical switch to match the actual state of the light. This may cause you to have to double toggle the physical switch to get it back in sync, but I know some people like being able to have a consistent state (up is on and down is off) for the switches throughout their homes.
If none of these stand out to you, chances are one of the others will. This dimmer also lets you configure the minimum & maximum brightness level, dimming step size and duration for automatic and manual control, state of the device after power failure, an off timer, and more.
Fibaro has a Bypass module that is intended for low loads that are attached to the dimmer. This made me question exactly how this device handles low power LED bulbs. It was no comprehensive test, but I tried 3 different types of LED bulbs without the bypass installed. The bulbs were made by Cree, Sylvania, and AmericanBright. I tried each brand in a 1 bulb and 2 bulb configuration (as the dimmer was hooked up to a two-light fixture). Although the range of light differed between the bulbs, I did not experience any of the common issues that you may run into with low power bulbs. There was no flickering when the bulbs were dimmed down to their lowest setting. They all emitted a solid light level, even during the tests that had a single bulb. When the dimmer was powered off, all of the bulbs turned completely off.
Overall, if you are in the market for this kind of device, the Fibaro Dimmer 2 will likely not disappoint. As a standard dimmable switch, it works exactly as you would expect. Dimming is smooth and it seems to work great with all of the bulbs I tried (incandescent and dimmable LED). For those with a compatible Z-Wave gateway that want a little more, this device has just about every configurable option you could want. You can fine tune it and tweak it to fit your specific needs. Fibaro has done a fine job on this Z-Wave dimmer, and their attention to detail clearly makes it stand out from the rest. If you are in the market for an in-wall dimmer, you can’t go wrong with this fantastic device.
Do you have anything to add from your own experience using the Fibaro Dimmer 2? Please share in the comments section below!
Visit Eric's blog smartlife.tech for more smart-home wisdom!
September 23, 2016
I am trying to figure out if I can use this to maintain manual control of my circuit (which I rarely use unless resetting my smart bulbs on the circuit) and still use the switch to have hub control of my smart bulbs on several different circuits in the room. I have smart bulbs on a few different switched circuits in a room. I want to be able to flip this switch to send an on or off signal to the hub to turn off the smart bulbs, not the circuit. Can I do this, and if so, can I also program a triple flip or some other action of the switch to kill the power to the circuit to reset my bulbs?
November 29, 2024
Home Assistant is slowly but surely becoming the ultimate platform for comprehensive home automation. It allows users to create a truly customized and connected environment with the most integrations we've ever seen. Home Assistant has a pretty powerful automation engine too so you can program anything from simple lighting control to complex, multi-device routines. And it's open source which means we can all contribute and the basic software is free.
The secret to making your Home Assistant set-up better than ever? Add Z-Wave to it! You can instantly increase the functionality, reliability, and device compatibility of your smart home environment. Z-Wave brings a vast range of new device options that can communicate securely and consistently. They are feature rich with tons of advanced settings to choose from so you can find a good match for any use case.
October 22, 2024
In today’s highly competitive alarm business, offering security alone is no longer enough. Customers are increasingly expecting more – they want smart security solutions that work seamlessly with their modern lifestyles. The great news for your business? If you already install alarm panels, there’s a good chance they come equipped with Z-Wave technology, a straightforward entry point to home automation.
Z-Wave is a robust wireless protocol that enables a wide array of smart home services, allowing you to move beyond the traditional boundaries of alarm systems and tap into the expanding market of home automation. By leveraging the already included Z-Wave protocol, you can offer your customers centralized control over lighting, thermostats, door locks, and much more – all from the convenience of their existing alarm panel. This not only enhances the value you deliver but also sets your business apart as an innovator in the security space.
September 26, 2024
Caring for aging parents or loved ones with limited independence is a journey filled with both emotional rewards and practical challenges. The emotional toll of balancing this responsibility with other aspects of life can be overwhelming. We want to share some helpful shortcuts from our field of expertise: smart home technology.
You'd be surprised how an inexpensive and simple system like a hub and a few connected devices can change your daily routine. With the guide below, we will help you create a supportive, secure environment tailored to your loved one’s needs, all while reducing the constant worry that comes with caregiving.
Jan (The Smartest House)
September 27, 2016
Hi Jon,
If the smart bulbs are Z-Wave, you will be able to associate them with the Dimmer 2 and have it control all associated bulbs directly by operating the switch (you’ll find more info on association on pages 17 and 26 in the manual). You can also use the switch to enable preset scenes including your bulbs (communication will the happen through the hub) – depending on the type of external switch you’ll use with the Dimmer 2, you will have a few programmable options (more on page 27 in the manual). Now, if you want to control the power on/power off for the circuit, you will have to have a Z-Wave relay installed for each circuit. Then any manual up/down toggle of the switch will turn the power on or off in the circuit. But you will not be able to cut power off remotely, using just one of the switches, for a circuit that does not have a Z-Wave relay (such as the Dimmer 2) there as well. Let us know if you have any other questions!